


Since the launch of iPhone in 2007, we have seen iOS hackers actively working on tools to jailbreak and unlock Apple devices. Some of the brilliant minds working on exploting iOS have taught us a lot of things, and one among them — the most popular one — is on how to jailbreak our iOS devices.
Sure most of us are aware of the difference between an untethered jailbreak and a tethered jailbreak, but there are people who get lost in the mix. There are people who still don’t quite understand how jailbreaking really works. And let me tell you: these people are in the majority.
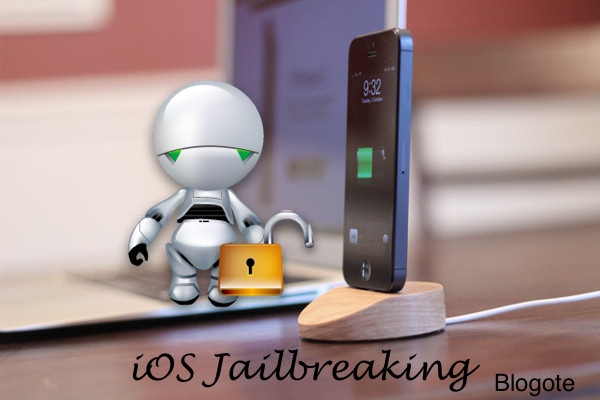
A Beginner’s Guide: How Jailbreaking Works
Plugging an iOS device to a computer, then launching a jailbreaking tool like Absinthe and clicking through a series of steps, and finally waiting for a couple of minutes is not what jailbreaking is all about.
A jailbreak process involves more than that. There are security checkpoints that needs to be bypassed or patched, signed files that must be deceived, and many other checks that must be escaped from the vigilant eyes of Apple.
A member at Reddit has written a comprehensive guide to help us understand about jailbreaking and how the whole process works. The pitfalls, complication and ways to exploit and jailbreak iOS devices are profoundly explained in this guide. Check it out:
What does Jailbreak actually means?
How does the jailbreak works?
Jailbreak itself is getting control over the root and media partition of your iDevice; where all the iOS’s files are stored at. To do so /private/etc/fstab must be patched.
fstab is the switch room of your iDevice, controlling the permission of the root and media partition. The default is ‘read-only’, allowing eyes and no hands. To be able to modify the root and media partition we must set the fstab to ‘read-write’, allowing eyes and hands (on the root and media partitions).
Sounds easy? Maybe. The main problem is not getting the files in, but getting them trough various checkpoints. These checkpoints were put by Apple to verify if the file is indeed legit, or a third-party. Every file is signed by a key, and with out it, the file will be put aside and be unusable.
So where do we get the key? Well, it’s not as easy as it sounds. These keys are not simply given out like candy in a Halloween night, which means we must either unscrew the lock (patch all of the checkpoints) or go trough the backdoor (bypass). As Saurik said, “patching this out is A) difficult (especially to track as Apple makes changes) and B) of marginal benefit as adding these hashes is easy.” In other words, it’s not worth it.
Before I explain how we bypass these checkpoints, we must go over some other stuff.
How does an iDevice bootup?
When an iDevice boots up it goes trough a “chain of trust”. This chain is a series of signature checks that makes sure everything being ran is Apple approved. It goes on the following (specific) order:
- Runs Bootrom: Also called “SecureROM” by Apple, it is the first significant code that runs on an iDevice.
- Runs Bootloader: Generally, it is responsible for loading the main firmware.
- Loads Kernel: Bridge between the iOS and the actual data processing done at the hardware level.
- Loads iOS: The final step to the chain, iOS starts and we get our nice “Slide to Unlock” view.
Great! Now that you know how your iDevice comes to life, let’s go to the next thing.
What is the roadbloack in a jailbreak?
What prevents an easy jailbreak is the signature checks. While the kernel is loading there are thousands of checks being done to make sure everything being loaded is Apple approved.
To be more specific, there are many checks trough out the boot which look for one thing, a signature, a key. If the key is correct we get a green light, if it is wrong, depending where the check was at or what file it was, it will either crash the iDevice causing a loop, or simply ignore it and does not execute that specific file at all.
So what is a jailbreaker objective?
The jailbreaker objective is to either patch the checks or simply bypass them. The conventional way is to bypass them as patching all of them would be simply to time consuming and not very beneficial.
Thus bringing us to the two main exploit categories:
- Bootrom exploit: Exploit done during the bootrom. It can’t be patched by conventional firmware update, and must be patched by new hardware. Since it’s before almost any checkpoint, the malicious code is injected before everything, thus allowing a passage way to be created to bypass all checks or simply disable them.
- Userland exploit: Exploit done during or after the kernel has loaded and can easily be patched by Apple with a software update. Since it’s after all the checks, it injects the malicious code directly into the openings back into the kernel. These openings are not so easy to find, and once found can be patched.
Userland exploits is the most common of them two as they are easier to find, and are software based.
How did some of the released jailbreak actually worked?
- Limera1n: Bootrom exploit first used by Geohot. Due to it being a bootrom it can’t be patched by Apple with a software update, which means it is still usable today in all A4 devices. Yes… including iOS 6.
- JailbreakMe: Userland exploit that used a malformed CFF vulnerability. CFF stands for Compact Font Format and it’s used to store fonts. Starting with PDF version 1.2 it could be imbedded directly into the .pdf file, but it had it’s malfunctions.
When you access Jailbreak.me via Safari on your iPhone, iPod Touch or iPad, it would automatically check if you are vulnerable, and open up the PDF file with the edit CFF. When the CFF opcodes (operation code, specifies the operations to be performed) were being handled, Comex (the developer of this exploit), found a way to get a stack overflow (when to much memory is being used in one stack and it attempts to access memory outside of it’s own stack), by repeatedly pushing and duplicating random numbers onto an “argument stack” (where arguments are stored).
By doing so, it allowed Comex to execute any command he would like. The problem with this is that even though he had control over the commands, root is still set as ‘read-only’. He would need to set root as ‘read-write’ so he could use the commands to his advantage, so Comex digged a bit further and found a IOSurface.framework vulnerability.
It would actually use a ROP payload to get access to the kernel memory with ‘read-write’ privileges. From there, it’s game over. He then would download wad.bin (Cydia), install, and restart springboard. You now have yourself a jailbroken device done by using a userland exploit in Safari. Keep in mind this exploit was huge. It still is categorized as the simplest (as in user term) and most effective jailbreak yet, while at the same time being a big worries to Apple. If someone could get into your Phone via Safari to install Cydia, someone could do the same to steal any information from your iDevice.
These are the two most know jailbreaks out there. Every other exploit is different, and usually patched by now.
Conclusion
Now that’s more than 1000 words of solid information on jailbreaking. As you may know, the iPhone Dev Team is working round the clock to fix bugs, minor issues, and bring new jailbreaking tools for iOS 5 and iOS 6 devices. These folks charge nothing to use the tools, and they don’t even accept donations.